It's been 13 months now that I started taking part in the Art Elements Theme Challenges. Each and every one
has been a challenge ... Choosing a subject, researching said subject, exploring new mediums & new techniques and generally pushing myself to try new designs that I wouldn't have thought about under 'normal' circumstances.
May's
AE Theme Challenge is Forest and was chosen by Susan Kennedy. I decided to take inspiration from my 'fandom' (bordering on Obsessiveness) of the Outlander Books & TV Series. Since I've been back here in the States (yes, still temporary), I read for about an hour before turning the lights out and am now in the 4th readthrough of the 8 books
(did I mention obsessive?). Not to mention some other Lord John books and Novellas.
I became interested in Penannular Brooches while watching the first couple of seasons. Historically (and even this point differs among historians), the Highlanders used them to pin up their Great Kilts (Plaids), which were long lengths of their Clan Tartan. In the series, it looks like they used modern type brooches, at least to this fan's eyes. After figuring out the basic workings & limitations of this type of fastener & the myriad of designs possible, I was driven to design & complete a few that are in our Etsy boutique. The first-born was a basic, simple forged piece out of heavy gauge square Brass that's popular with Highlander Re-enactment groups. Others are in Copper; a Heart with a Ruby gemstone, Cat Ears and one to match my New Beginnings line of pieces (Outlander-Inspired, of course). I still have sketches for many more and they will all come in their own time ...
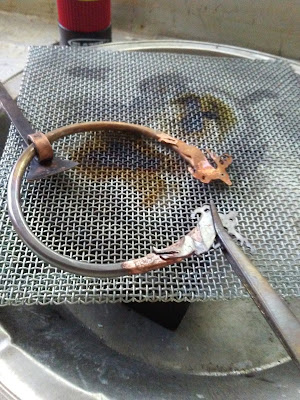
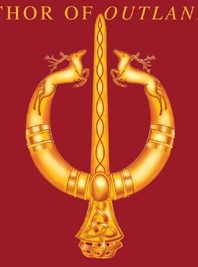
The one for this challenge was the most challenging to date! I set out to replicate, to the best of my ability, the cover image from Book 5, The Fiery Cross, which is the next TV season coming up this fall .. hopefully. This image is not the completely finished and polished piece. See caption.
 |
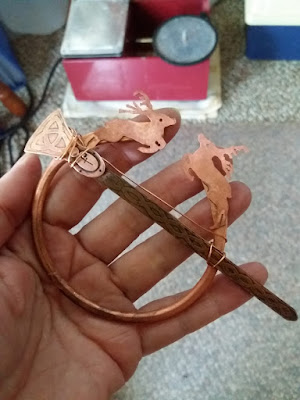
| Mine is less shiny than the illustration, and I like it that way ... rustic! And no rings. You can see the other artistic liberties I took. It still needs much more polishing to bring out the copper shine and contrast with the oxidization. But it's 11pm and I just want to get this blog post done! |
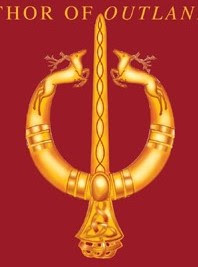 |
| Inspiration from Cover of Book 5, The Fiery Cross |
The idea had been floating around in the ole' noggin for a few years and I always put it off because of the complexity of the Stags. Also called Bucks, Deer, etc. depending on where one lives. I mean by that, sawing seemed too complicated; trying to find similar in a ready-made 'charm'; waiting to gain more experience with aforementioned saw.
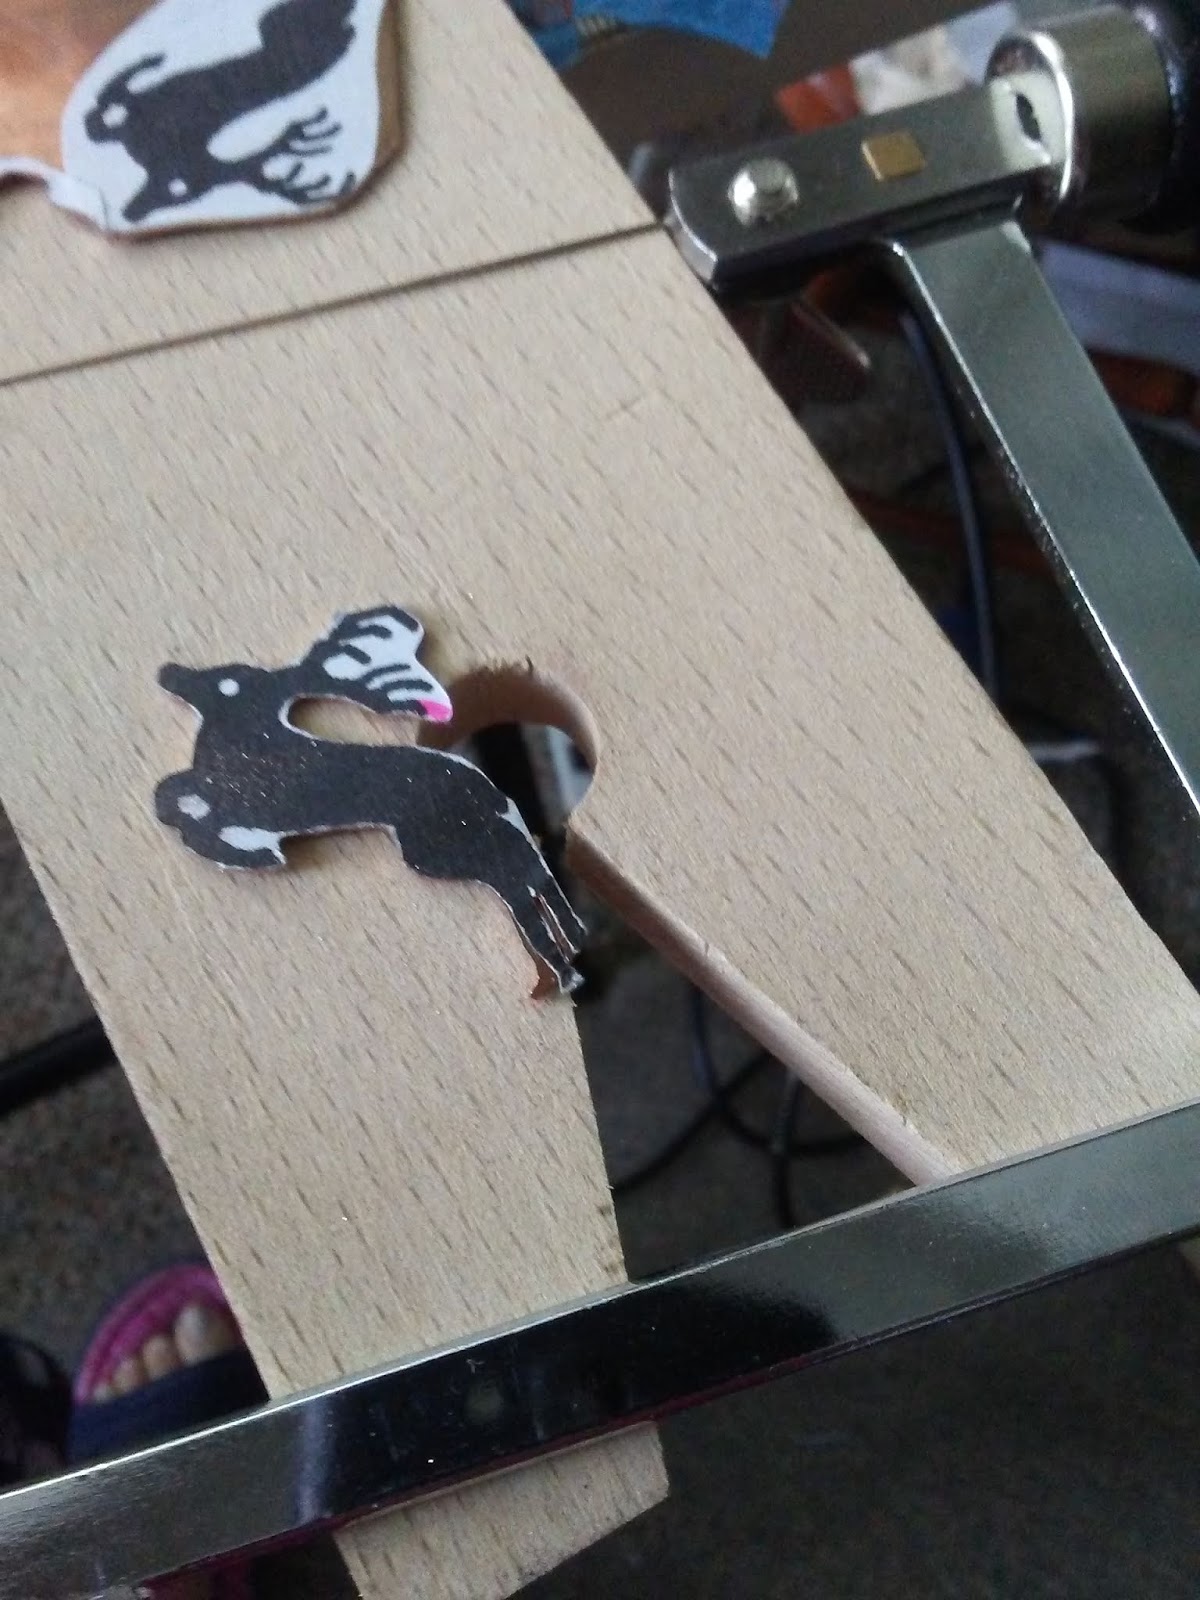
When I learned of this month's Challenge Theme, I hemmed and hawed for a few hours, then armed myself with courage and proceeded to cut out
not one, but
two of these leaping babies, taking some artistic liberties with the original illustration.
 |
| You can see that my Bench Pin hasn't gotten that much use! It was safely tucked in a drawer but I've left it attached to a corner of the table to speak to me often. OH, Shame! Unpainted toenails ... in the South no less! |
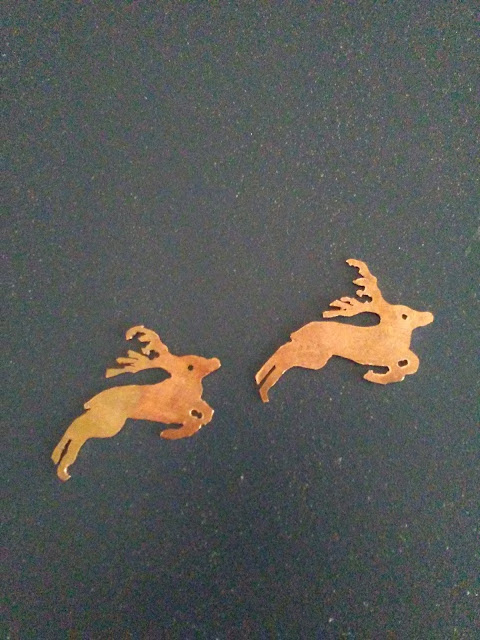 |
| They look pretty darn good if I do say so myself! I 'cheated' a little with my hole punch. Sorry Evie! 😀 |
I used 24 ga. Copper Sheet only because the Brass I have is way too thick. It was a good decision because the only large gauge wire I have is Copper too. So I formed the 'annular' part of the brooch out of 6 gauge round 'wire'. No less than 8 annealing and pounding sessions were necessary to form the ring and flatten each end so as to attach a 'leaping stag' to each.
The pin proved to be a tad easier though just as time-consuming. I cut the top portion out of the same Copper Sheet as the stags. As I've said before, I can't do the heat transfer method for etching (I think) Mom's iron isn't hot enough, it's one of those auto-off models. So I draw directly with Paint Pens used as a resist. The design is more rustic, but I did say I like rustic!
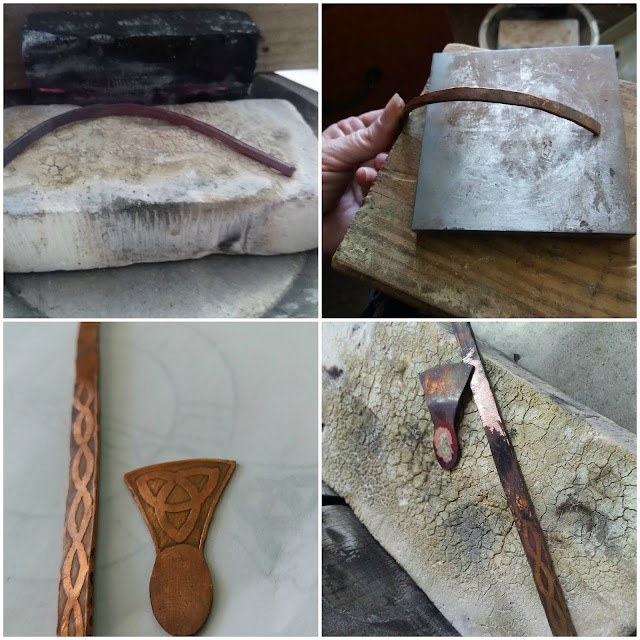 |
Top L: 1/8" Annealed wire for Pin; Top R: After flattening, I think this was after 5 or 6 anneal/pound sessions!
Bottom L: After etching, before "F"; Bottom R: 3rd FAIL of soldering "F" under triskelle. |
Soldering the leaping stags onto the flattened ends proved to be frustrating also. One of them worked on the second try, but the other one took two more rounds of clean, file, clean, flux, solder, pickle .. repeat!
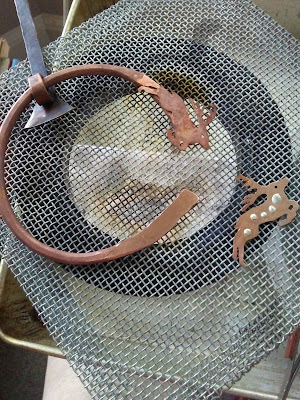 |
| I used the sweat soldering method, this is the last go-around. |
 |
| The use of cross lock pliers on this side helped keep the stag from really leaping out of place! |
 |
Et Voila! What I thought was my successful, final solder!Wired together before going into the tumbler.
The right hand side stag was firmly (I thought) attached.I checked and it didn't move. Not sure why it came off. |
Hey, want to know a secret? In the first image of this post, the stag is just placed on the end, the solder didn't hold and came off in the tumbler. I cannot tell a lie.
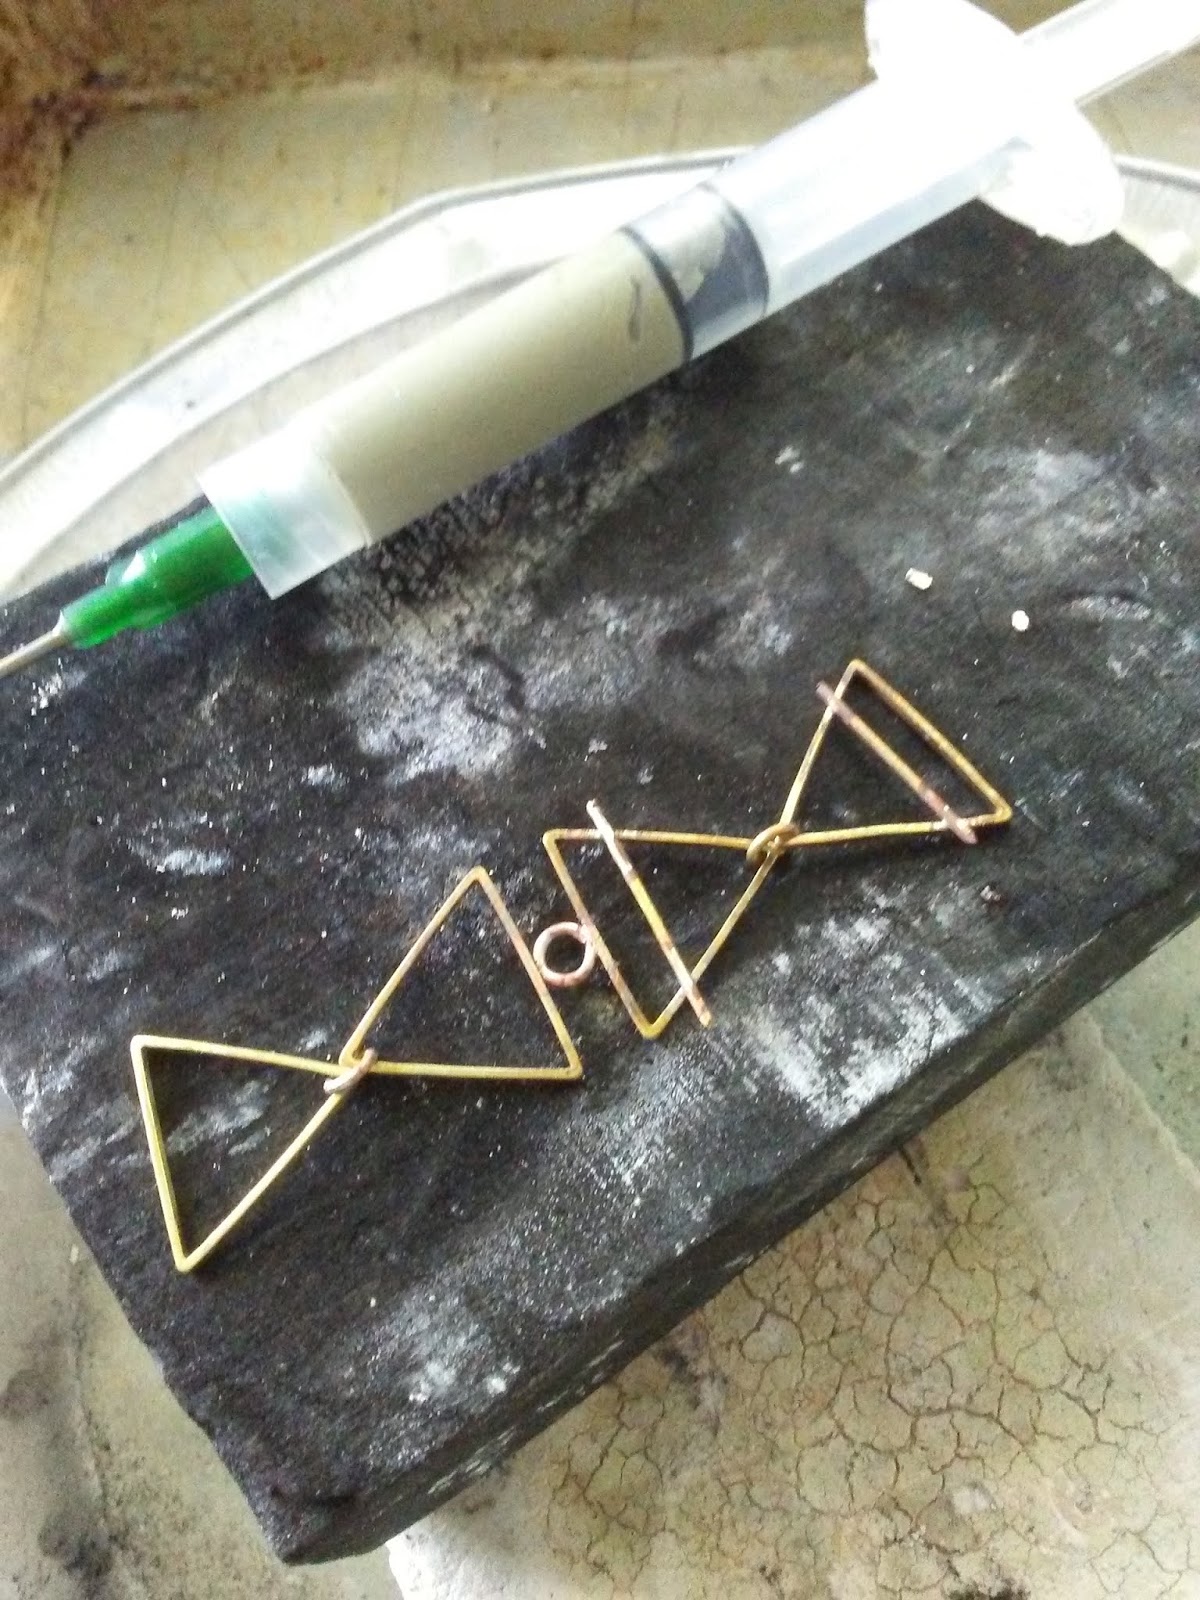
I had started another project that had a sneak peek or two on social media this month, but wasn't quite able to finish it. Still needs some snipping, the bail and a trip through the pickle and tumbler. I was happy that my attempt with paste solder worked on the jump rings and for joining the two sections.
 |
| Do you know what these shapes are? |
Merci for taking the time to peruse this post and please do comment! Also, join me in the blog hop to see all the works of some super-talented artists who joined in this month's Forest Theme Challenge. Grab a cuppa or a dram (or both), whatever gets you through ...
Al.


Gosh, I am already stunned at this stage even if it is not completely finished! What a gorgeous pieces and I am so impressed with the little stags! They look cool as well as cute :)
ReplyDeleteThank you kindly, Claire! I don't know if I'd attempt it again, this will definitely be a OOAK piece!
Deletewow! that is gorgeous and so much work, I loved reading how you approached the making of it, although I did laugh as I was so engrossed in reading that when I read 'unpainted toe nails' I thought I had missed something and had to go back and re-read from the beginning until I saw your toes in the photo! I am still chuckling now! Fabulous work I do love that pin :D
ReplyDeleteHa ha Laney. Glad I caught you by surprise! Made MY day :) ... Thanks for compliments.
DeleteYour sawing is awesome - you did an amazing job (you could give mom a run for her money!). I love how the brooch turned out. Thanks for showing images of the sweat soldering - I suck at soldering - but I like seeing the different methods everyone does to get a piece to stick (darn it!). Really love how that pin turned out - amazing work!
ReplyDeleteBeth, I'm not even on the same plane as your Mom! I suck at soldering too, but being stubborn and an eternal optimist .. well ..
DeleteOh Alysen!!!! It's breathtakingly swoon worthy (if that's a term?) I am a huge Outlander fan and an now reading book #5 so this is just beyond words. Your sawing skills are amazing and using copper was perfect. I just know you will get that stag attached again. I suck at soldering and need more lessons so I am in awe of this piece. Brilliant job;-)
ReplyDeleteOch! Cathy, let's make it a word! Thank you for the more-than-kind sawing compliment. Will keep trying to keep that guy in place, and will surely post on Ig when I do!
DeleteI have to admit that I haven't read or watched any of the Outlander series, though what I've seen of the tv series does interest me. You've definitely piqued my interest too. I hate that your one stag won't stay on, but I'm so very impressed with what you did make so far. It's SO COOL! And, good for you for jumping in and getting down to it. I need to do the same thing. I have a saw and some of the supplies, but just keep putting off the serious metalwork. Go you for facing the challenge!!
ReplyDeleteThanks Hope for the compliments :) . I hope you do get around to reading/watching Outlander. I've learned a lot of History from the books too. Yes, I'll probably attack another sawing project soon!
DeleteI've only read two of the books, it's a great series! What a fantastic job you did - and thanks for showing your process as well! I'm not a solderer or a sawer so I'm extra in awe! Thanks for joining in!
ReplyDeleteSue, I'm not a solderer either! As you can see ... Lots more practice necessary. I only have the two Butane torches so must work within my means :) . Thanks for providing such a vast, interesting theme.
DeleteI have been into brooches lately too. I started to make one with the pin attached only to realise that it only works for penannular brooches. Stupid me! But you have done a fantastic job with your brooch. The leaping stags look amazing. Why don't you try soldering the ring to the stag and not the other way around? you can use rod solder and run it along the sides of your copper rod. But cleanup will be messy and you might have to oxidise the whole thing .
ReplyDeleteDivya, I made a wirework Eye of Ra brooch a couple of years ago with a regular pin made out of wire. It was my first one, sort of flimsy and I've learned alot since then. Haven't tried again though. I do love penannular brooches!
DeleteI ran the torch under the screen to heat the ring since it's heavier and didn't want to melt the thinner metal cut outs. Also, I didn't want to waste my silver solder by touching the wire to the ring. I do have some copper brazing rods so I might try that with one of those! I really think I need to flatten and file that side a little more ... Ho Hum, I will keep at it and post my success story on Ig ...
Just gorgeous - excellent work!
ReplyDeleteThank you Lesley :)
DeleteGorgeous work. I am intimidated by fire and have not attempted soldering so I can only imagine how challenging the assembly has been. I hope you get it to work for you. The etching and sawing look great. Beautiful idea.
ReplyDelete